
In my previous post Home Lab Step-by-Step Part-4-virtual router, we configured complete underlay networking for our Nested SDDC, We will do BGP configuration once we advance thru the lab.
As now we have Compute, Storage and Network ready, we need the infrastructure services, such as DNS, Active Directory and NTP.
We need to install one windows server which will serve as an active directory, DNS and iSCSi server for our setup.
In order to install the windows server, we would need windows server ISO. Now we will start installation of the server.
We will login to the ESXi server we installed, https://youresxiIP and use "root" credentials for login.
We will use the same steps as we used in deploying CSR1000v in our previous post and we will deploy it on the management network. We will use below mentioned IPs for our servers.


Select removable devices>>cd/dvd drive 1>> select the ISO.

Once it find ISO file attached, it will ask you to press any key to boot from CD, press any button.


Once files are loaded, you will be presented with this screen to choose the Language, Time and currency format and keyboard layout, I will leave it as is and move next with the installation wizard.

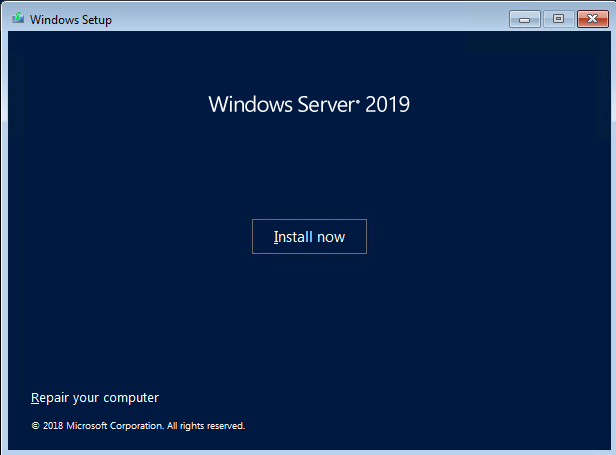
In this screen, click Install Now.

Select standard desktop experience version for installation. For evaluation purpose you can use datacenter edition as well, but for us we really don't need the features we get with DC edition.

Accept the license agreement and press next.

Select the type of installation, we do not have old version of server on this VM hence we will use the second option, which is Custom.


Installation of windows server will start. Once installation is finished, we will start next step. Which is installing Active Directory and DNS services.

Once installation is over, server will be restarted.

Set Administrator password and finish the installation.

With this step we have finished server installation and now we will start assigning the IP address to the server, setting up timezone and configuring Active Directory domain services with DNS.

Under network connections window select change connection properties>> Change adaptor options.

Right click on the network adaptor, and select properties


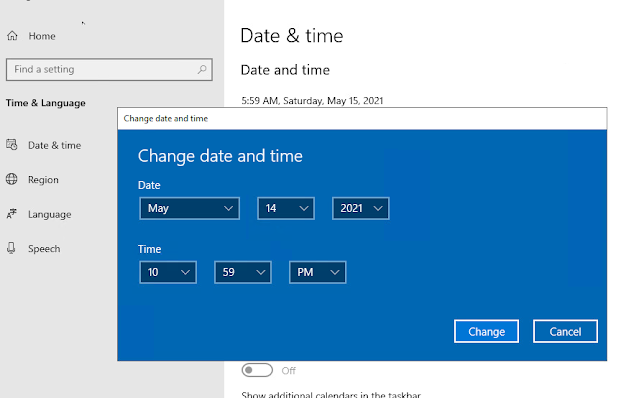
Next step is to set the correct time zone and time, for that we will right click on the clock displayed in the task bar, which is located on the right hand side bottom corner. Click on adjust date and time.


Before we install AD, one last step is to rename the server. Right click on windows icon and click on Run
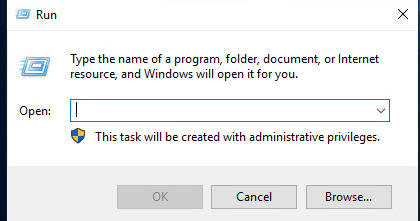
Type "sysdm.cpl" hit enter and it will open system properties. Click on change to rename the server as "ADDC" and click OK.


It would ask you to reboot the server for this to take effect. Hence click ok, and on the next popup select restart now.


After reboot, login to the server and start Active Directory installation. As soon login will finish, you will be presented with server manager, click on Add roles and features.

Click next on the first screen.

Select Role-based or feature based installation, click next.

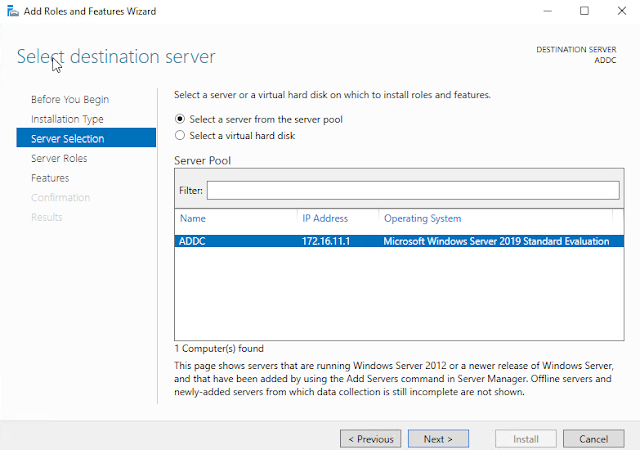


Now select DNS server in the same list and make sure include management tools is check for this as well. Click on add features and click next.


Do not make any changes here just click next.

Move on to the next screen and click next on the confirmation screen click install.


Now wait for installation to finish, before we start configuration.

Once installation is finished we need to start AD configuration. Hence click on promote this server to a domain controller.

In the AD configuration wizard select option add a new forest and provide name for the root domain. I am using lab.local as my domain name.

Leave all default options and provide Directory service restore mode password. Click next.


Keep the netbios name generated automatically and click next.


Review the options, and click next.

Wait for pre-req checks to get complete.

Once all Pre-reqs are checked, click on install.

Once server is configured as DC, a system reboot will be triggered automatically.

Once reboot is complete, login to your newly created domain with domain admin credentials (Administrator becomes domain Admin). Open user and computers, dns management console to verify.


Now we will, add DHCP and iSCSi Server. On the server manager select add roles and feature, and in the wizard select, Role based or feature based Installation.


Select DHCP, and check add management tools.

Now expand File and Storage services, select iSCSi target server.

Just click next, until the confirm page is displayed, select the check box restart the destination server automatically if required and click install.


Thanks for the Great blog !!!
ReplyDeleteAfter installation of the windows server we are able to RDP from 192.168.x.x which is our laptop IP. That means network is well connected.
We are not able to access the internet from the window server which is configured.
Can you please let us know how we can do that incase we want to give internet access to 172.16.11.x CIDR.
Thanks
You should be able to access internet once your dns role is configured. If you try to access with out dns then for each website you need to connect to IP address of that website. (I hope you have configured the return route for the 172.16.x.x subnet on your physical router, as I showed in my previous post.)
DeleteThanks for your reply. The routing rules are configured as explained by you in your last post. After doing that configuration i am able to access the RDP of the windows machine from my laptop.
DeleteGreat, if you have not installed DNS role on this machine yet then configure 4.2.2.2 (public dns server) as dns server in ipv4 config details. Internet would start working.
DeleteHi, noticed you configured the DHCP role but did not configure it, when do you configure the DHCP or did i miss out a part on that.
ReplyDeleteHi Dear,
DeleteI installed DHCP for meeting a requirement for my future lab where you can use DHCP for leasing out TEP IPs rather than using an IP pool.
But didnt configure as when I started the series new version didnt need DHCP.
It's a Really nice blog really helpful.. Just a query currently I got the access to one of my office esxi box but if I need to build this setup at home what configuration of system would be needed.
ReplyDelete