
In my previous post Home
Lab Step-by-Step Part-9-HA-DRS,
we completed the deployment of our virtual SDDC, and now we are ready to test
different solutions.
Here, I would try to add some history, relevance and information about the solution we will be deploying in our lab environment. This should give you a fair understanding why we are doing something and what is the use case. Which becomes very helpful when we go out in real world for designing solutions for our customers.
So, let’s start with
vSAN. First question which should be answered is “What is vSAN”?
Probably you already
know the answer of this question, if not than let me help you with that.
Every datacenter
(physical or virtual) comprises of five core elements, Compute, Storage,
Network, Backup/Recovery and Security.
As technology was
evolving and compute resources (CPU and RAM) were already put in to better use
with the help of virtualization, Storage and Network were still running in
traditional fashion. For ages our seniors were designing solutions with
physical Storage solution (SAN, NAS and DAS) and Physical network. Back in year
2009 engineers like you and me realized that as everything is evolving and
getting virtualized, why can’t we innovate the storage space. Now tech giants
like VMware, Nutanix, Dell, HPe etc, started investing in the space of
virtualizing SAN solutions (hardware/software). That brought hyperconverged infrastructure into life.
In Aug, 2013 VMware
launched its own software defined storage solution with the name virtual SAN,
at that time organizations and technologist had mixed feelings about the
product, as they were comfortable designing solutions around traditional
SAN/NAS. Virtual SAN promised to use the aggregated capacity of disks attached to
server hardware, which will eventually reduce the space, cooling and power used
by the big SAN/NAS device, which looked really promising. But the major concern
was will it be able to deliver the performance/availability equivalent to
traditional storage?
Well, those are the
days of past, with improvements in vSAN technology in today’s world adoption rate of vSAN is increasing each day. By saying that, I am not telling
you that traditional SAN is out of picture, but organizations are adopting vSAN
on use case basis and getting real good ROI (It can be different figures for each customer based on other factors).
As far as performance is concerned vSAN has shown really good results refer
this article for mixed workloads storage performance on vSAN and vSAN Performance Evaluation Checklist is available to see it for yourself by
performing POC.
It would be an
injustice, if we leave the topic here without talking about the competition. I
would recommend you to do visit the link and check for the available competitions.
This was a little
about vsan, I would recommend you to read a little in depth about the technology, to be
prepared for using it. J
Now we know that, vSAN is the software defined storage solution, which aggregates the capacity of directly attached disks on the server hardware, and creates a vSAN volume/datastore for our SDDC environment. We will start configuration of vSAN.
There are certain requirements
for enabling vSAN, which are listed on this link.
To achieve successful testing of vSAN I have deployed one more ESXi host and added 3 additional disks on each host. If you are unsure about how to install ESXi host, I would recommend you to visit my post which explains nested esxi host installation steps. To add additional hard disks which we will use for vSAN configuration. Login to physical ESXi host, navigate to the Virtual machines tab, select nested esxi host, right click on it and select edit settings.


Once new esxi is ready, add it to the existing cluster if you are unsure how to add host in vCenter kindly refer my previous post, now cluster should have three hosts.

Before we enable vSAN services, we need to perform few other actions, first one is to add vSAN vmkernal NIC. To achieve it we need to create one distributed port group for vSAN traffic.

In new distributed port group wizard, provide a name, and move next.


Review inputs given earlier and finish the wizard.

Now lets move to host and cluster view, select first host and assign vSAN VMkernal NIC. Select first host, navigate to configure tab and select VMkernal adaptors under host networking.You already have vmk0 and vmk1 for management and vMotion respectively. Now we will add vmk2 for vSAN. Click on add networking.

Add networking wizard will be presented, please select VMkernal network adaptor, move next.

Select existing vsan network which we created, and click next.


Assign static IP address for this adaptor and click next.

Review provided values and click finish. Follow same steps on remaining 2 hosts.

You should be able to ping your vSAN adaptor IP in your network, you can validate the same from your machine.

Once you complete vmk nic addition on all the hosts, our vSAN network is ready but we are still not ready for enabling vSAN services, because vSAN architecture needs SSD for cache tier, whether we are deploying hybrid model or All flash. Hence now we need our esxi to think it has all SSD disks connected instead of virtual disk/HDD.


Now after marking them as flash disk, you would see now under drive type instead of HDD it shows Flash. Please be aware this step is only required in nested environment, in production environment don't change the disk type until instructed by VMware GSS.

Now we have configured hosts for vSAN network, we have one cache and two capacity drives, which is minimum requirement for configuring vSAN, minimum recommended number of hosts in any vSAN cluster by VMware are four, depending on FTT value number minimum hosts can increase, please refer vSAN policies to understand it.

Here we are configuring single site cluster, you have other options which you may choose in production based on solution design.

If you have HA enabled in your environment (like I have) you would be presented with the warning to turn it off for vSAN configuration, proceed with after turning it off.

Once HA is turned off, in the services screen select services which you wish to enable. For space efficiency you can choose compression only or dedup and compression, however in this deployment I am choosing none and leaving all other option turned off as well.

Now, we will claim the disks we prepared for vSAN, wizard automatically selects the unclaimed disks for capacity and cache tier and groups them based on either disk/model type or host.

If you change the grouping to host you can see which disk is being claimed for what purpose each host level.


You must have noticed vSAN direct next to vSAN in the claim disk screen, well its a new feature launched by VMware in vSphere 7u1. It has been launched keeping supervisor services in mind. Mr Vladan Seget has wrote a really nice blog on configuring vSAN direct, would recommend to read it once for better understanding.
Once you have enabled/configured vSAN you will be able to see this screen under services.

Now vSAN is enabled and you can start provisioning workloads on the vSANdatastore, in order to create storage policies I would recommend you to navigate to policies and profile menu.

You would see there is a default vsan policy (that is the current policy applied to all workloads hosted on vsan datastore), you can create new or copy default vsan policy to tweak and change to create new policies. At the end you can create policies which are required for your workloads as per their need. As vsan is a object based storage you can apply policies on each object basis.

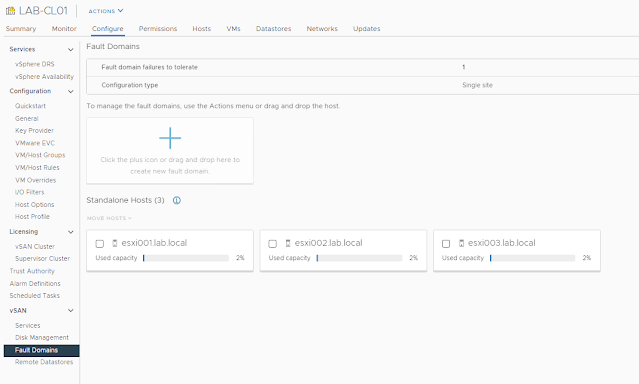
Now under vsan services, you will find couple of more options such as disk management and fault domain. whenever you need to perform any action on disks which are already claimed or unclaimed, you need to visit disk management tab, to manage the disk groups as well you need to navigate here.
A few things to understand about disk groups:
Each host that contributes storage in a vSAN cluster will contain at least 1 disk group.
Disk groups contain at most 1 cache device and between 1 to 7 capacity devices.
At most a vSAN host can have 5 disk groups, each containing up to 7 capacity devices, resulting in a maximum of 35 capacity devices for each host.
Whether hybrid or all-flash configuration, the cache device must be a flash device.
In a hybrid configuration, the cache device is utilized by vSAN as both a read cache (70%) and a write buffer (30%).
In an all-flash configuration, 100% of the cache device is dedicated as a write buffer.

Under fault domain you should create fault domains and place each host accordingly. Remote datastore gives you an option to share vSAN datastores across vsan clusters. I have not created fault domains, but would recommend you to get your hands dirty and try creating fault domains.
When working with vSAN, consider the following limitations:
vSAN does not support hosts participating in multiple vSAN clusters. However, a vSAN host can access other external storage resources that are shared across clusters.
vSAN does not support vSphere DPM and Storage I/O Control.
vSAN does not support SE Sparse disks.
vSAN does not support RDM, VMFS, diagnostic partition, and other device access features.
Under Monitor tab, vSAN select proactive tests and run both Network performance test and VM creation test to check if vSAN is performing as expected.

Before I conclude this post I want you to visit the page skyline health under monitor tab, you can perform health check of the vSAN cluster, there are other options such as virtual object, physical disks, resyncing objects etc. I would recommend you to explore these tabs and read about each option and dont forget to turn on HA which we disabled to configure vSAN.

I would request you to suggest what product you would want to integrate in our homelab series next. Hope you have enjoyed reading this post, If you did, then please share it in your network. In my next post Home Lab Step-by-Step-NSX-T 3.1 design and Install I am starting series of posts covering NSX-T.

Can we implement on our laptop if yes what configuration is required in laptop?
ReplyDeleteMaximum RAM supported on most of the laptops Which are released in recent years is 64GB, and as all the components have minimum CPU and RAM requirements, you can do most of the labs (If you have 64 GB RAM and 8 Physical Cores), but Labs such as vCF would require at least 128 GB of ram and 32 Cores.
ReplyDeleteSeveral portgroups were created on the gues ESXi and CSR switch. Sofar you have used just the "Nexted-trunk" port. Where else will the other ports be used or what is the purpose of creating nested-esx-vmotion, nested-esxi-vsan etc. ports?
ReplyDelete